Firebase
This guide will show you how to integrate Auth as a custom authentication provider for Firebase and automatically create a document in the users Firestore collection when a user signs up successfully.
If you want to interact with the code for the Auth + Firebase integration that we'll be building in this guide, you can checkout the following GitHub repository, or clone it with the command below:
npx thirdweb create app --template firebase-auth

Prerequisites
- Create a Firebase project
- Register your Firebase app
- Create and export a service account as a JSON file
Set Up
To begin with, let's create a new Next.js project with the SDK configured:
npx thirdweb create --app --next --ts
From within the created directory, we need to install @thirdweb-dev/auth, firebase and firebase-admin:
- npm
- Yarn
- pnpm
npm install @thirdweb-dev/auth firebase firebase-admin
yarn add @thirdweb-dev/auth firebase firebase-admin
pnpm add @thirdweb-dev/auth firebase firebase-admin
Configure Firebase
We'll use environment variables to store our Firebase configuration.
Create a .env.local file in the root of your project and add the corresponding values from your Firebase project:
NEXT_PUBLIC_API_KEY=<firebase-app-api-key>
NEXT_PUBLIC_AUTH_DOMAIN=<firebase-app-auth-domain>
NEXT_PUBLIC_PROJECT_ID=<firebase-app-project-id>
NEXT_PUBLIC_STORAGE_BUCKET=<firebase-app-storage-bucket>
NEXT_PUBLIC_MESSAGING_SENDER_ID=<firebase-app-messaging-sender-id>
NEXT_PUBLIC_APP_ID=<firebase-app-app-id>
FIREBASE_PRIVATE_KEY=<service-account-private-key>
FIREBASE_CLIENT_ID=<service-account-client-id>
FIREBASE_PRIVATE_KEY_ID=<service-account-private-key-id>
FIREBASE_CLIENT_EMAIL=<service-account-client-email>
Most of the above environment variables can be found in the settings page of your Firebase project (after adding a Web app to your project), or in the service role JSON file you created and downloaded earlier.
Create a new directory called lib and create two helper scripts to initialize Firebase in the browser and server:
Now we have an easy way to access Firebase Auth and Firestore in both client and server environments!
Configure thirdweb Auth
Finally, to configure thirdweb Auth, we just need to add the NEXT_PUBLIC_THIRDWEB_AUTH_DOMAIN environment variable to the .env.local file as follows:
NEXT_PUBLIC_THIRDWEB_AUTH_DOMAIN=<thirdweb-auth-domain>
The NEXT_PUBLIC_THIRDWEB_AUTH_DOMAIN is used to prevent phishing attacks - and is usually set to the domain of your project like example.com. You can read more about it in the thirdweb Auth Documentation.
ThirdwebProvider
Inside the pages/_app.tsx file, configure the authConfig option:
import { ThirdwebProvider } from "@thirdweb-dev/react";

export default function MyApp({ Component, pageProps }) {
  return (
    <ThirdwebProvider
      clientId="your-client-id"
      authConfig={{
        // Set this to your domain to prevent signature malleability attacks.
        domain: process.env.NEXT_PUBLIC_THIRDWEB_AUTH_DOMAIN,
      }}
    >
      <Component {...pageProps} />
    </ThirdwebProvider>
  );
}
Sign Up / Log In Users
The process of creating users in Firebase by authenticating them with their wallet has two steps:
- Authenticate the user with their wallet
- Create a user in Firebase with the knowledge that they own this wallet
On the homepage (pages/index.tsx), we'll allow the user to connect their wallet and then sign in with Ethereum.
import React from "react";
import { ConnectWallet, useAddress, useAuth } from "@thirdweb-dev/react";
import { doc, serverTimestamp, setDoc, getDoc } from "firebase/firestore";
import { signInWithCustomToken } from "firebase/auth";
import initializeFirebaseClient from "../lib/initFirebase";

export default function Login() {
  const thirdwebAuth = useAuth();
  const address = useAddress();
  const { auth, db } = initializeFirebaseClient();

  return (
    <div>
      {address ? (
        <button onClick={() => signIn()}>Sign in with Wallet</button>
      ) : (
        <ConnectWallet />
      )}
    </div>
  );
}
The signIn function:
- Makes a request to the
api/auth/loginendpoint to get a custom token from Firebase - Signs the user in with the custom token
- Creates a user in Firestore with the verified user's address
// Note: This function lives inside the Login component above.
async function signIn() {
  // Use the same address as the one specified in _app.tsx.
  const payload = await thirdwebAuth?.login();

  try {
    // Make a request to the API with the payload.
    const res = await fetch("/api/auth/login", {
      method: "POST",
      headers: {
        "Content-Type": "application/json",
      },
      body: JSON.stringify({ payload }),
    });

    // Get the returned JWT token to use it to sign in with
    const { token } = await res.json();

    // Sign in with the token.
    const userCredential = await signInWithCustomToken(auth, token);
    // On success, we have access to the user object.
    const user = userCredential.user;

    // If this is a new user, we create a new document in the database.
    const usersRef = doc(db, "users", user.uid!);
    const userDoc = await getDoc(usersRef);

    if (!userDoc.exists()) {
      // User now has permission to update their own document outlined in the Firestore rules.
      setDoc(usersRef, { createdAt: serverTimestamp() }, { merge: true });
    }
  } catch (error) {
    console.error(error);
  }
}
In this function, you'll notice we're calling the /api/auth/login endpoint to get a
custom JWT token from Firebase.
Let's take a look at that API route.
Auth API Route
Create a folder that lives in the /pages/api/auth directory called login.ts.
This API route is responsible for:
- Verifying the payload provided by the client
- Once the payload is verified, creating a custom token for the user to sign in to Firebase with.
import { NextApiRequest, NextApiResponse } from "next";
import { verifyLogin } from "@thirdweb-dev/auth/evm";
import initializeFirebaseServer from "../../../lib/initFirebaseAdmin";

export default async function login(req: NextApiRequest, res: NextApiResponse) {
  // Grab the login payload the user sent us with their request.
  const payload = req.body.payload;

  const { address, error } = await verifyLogin(
    process.env.NEXT_PUBLIC_THIRDWEB_AUTH_DOMAIN as string,
    payload,
  );
  if (!address) {
    return res.status(401).json({ error });
  }

  // Initialize the Firebase Admin SDK.
  const { auth } = initializeFirebaseServer();

  // Generate a JWT token for the user to be used on the client-side.
  const token = await auth.createCustomToken(address);

  // Send the token to the client-side.
  return res.status(200).json({ token });
}
You'll now be able to use Firebase Authentication to authenticate users with their wallets!
Firestore Rules (Optional)
You'll likely want to add a security rule to your Firestore database that only allows users to update their documents.
rules_version = '2';
service cloud.firestore {
  match /databases/{database}/documents {
    // The wildcard expression {userId} makes the userId variable available in rules.
    match /users/{userId} {
      // Only allow users to update their own documents.
      allow create, update, delete: if request.auth != null && request.auth.uid == userId;
      // But anybody can read their profile.
      allow read;
    }
  }
}
Viewing the Result
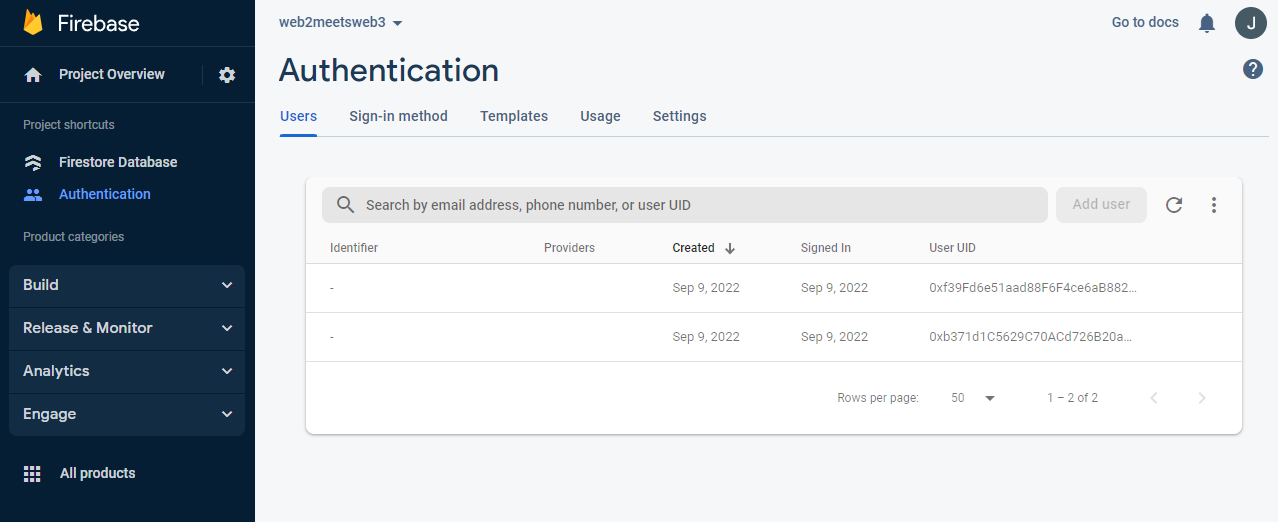
When you click the "Sign in with Ethereum" button and successfully sign in, you'll be signed up as a user in Firebase:
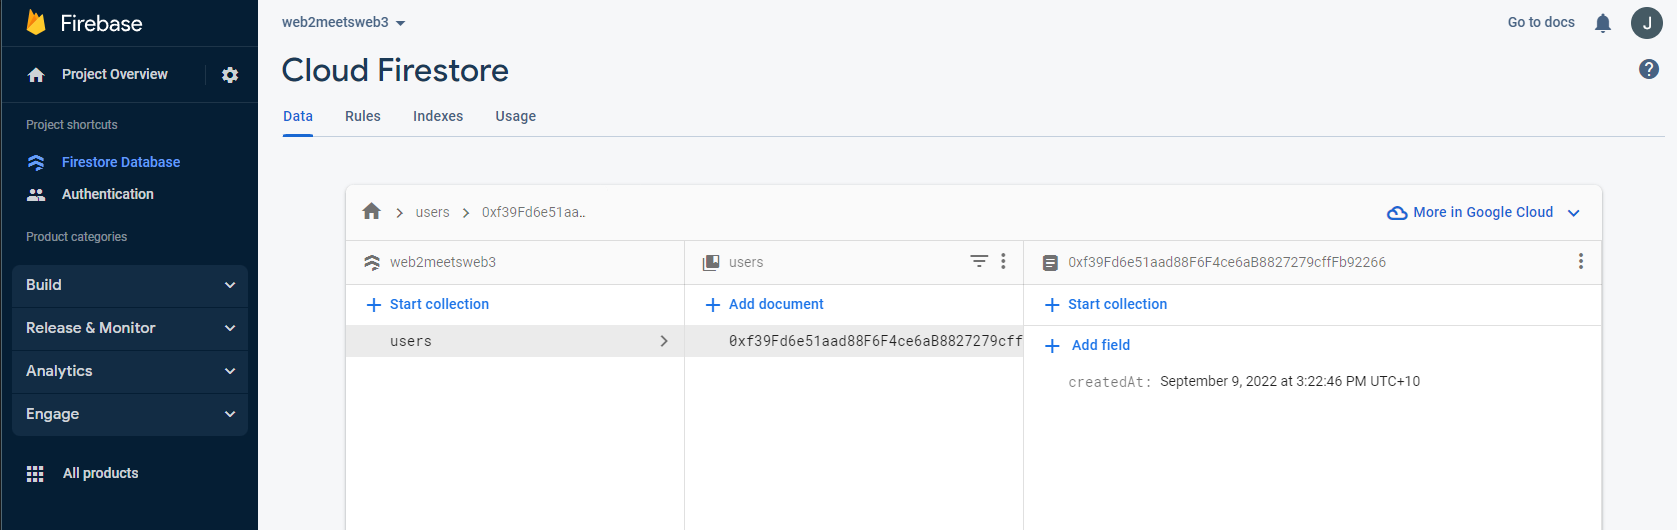
And a new document will be created in your users collection in Firestore:
You can now use all the functionality of Firebase Authentication and Firestore to build your app!