Create a custom auth server
Learn how to integrate your auth backend with our embedded wallets solution so you can onboard your users into web3 seamlessly.
This guide will show you how to create your own Auth Server that is compatible with the auth_endpoint strategy. By doing so, you can have full control over user authentication and data security. This allows you to ensure that your application meets specific compliance requirements while also providing a customized sign-in experience.
This guide is simplified for demonstration purposes and is not ready for production use. When modifying it for production, secure your endpoints and avoid hard-coding secrets or sensitive information. We recommend using environment variables and secret managers.
5 minute quickstart
Navigate to Wallets > Embedded Wallets in the thirdweb dashboard.
Create a thirdweb API key if you don't have one or select an existing key to use for this project. Learn more about API keys.
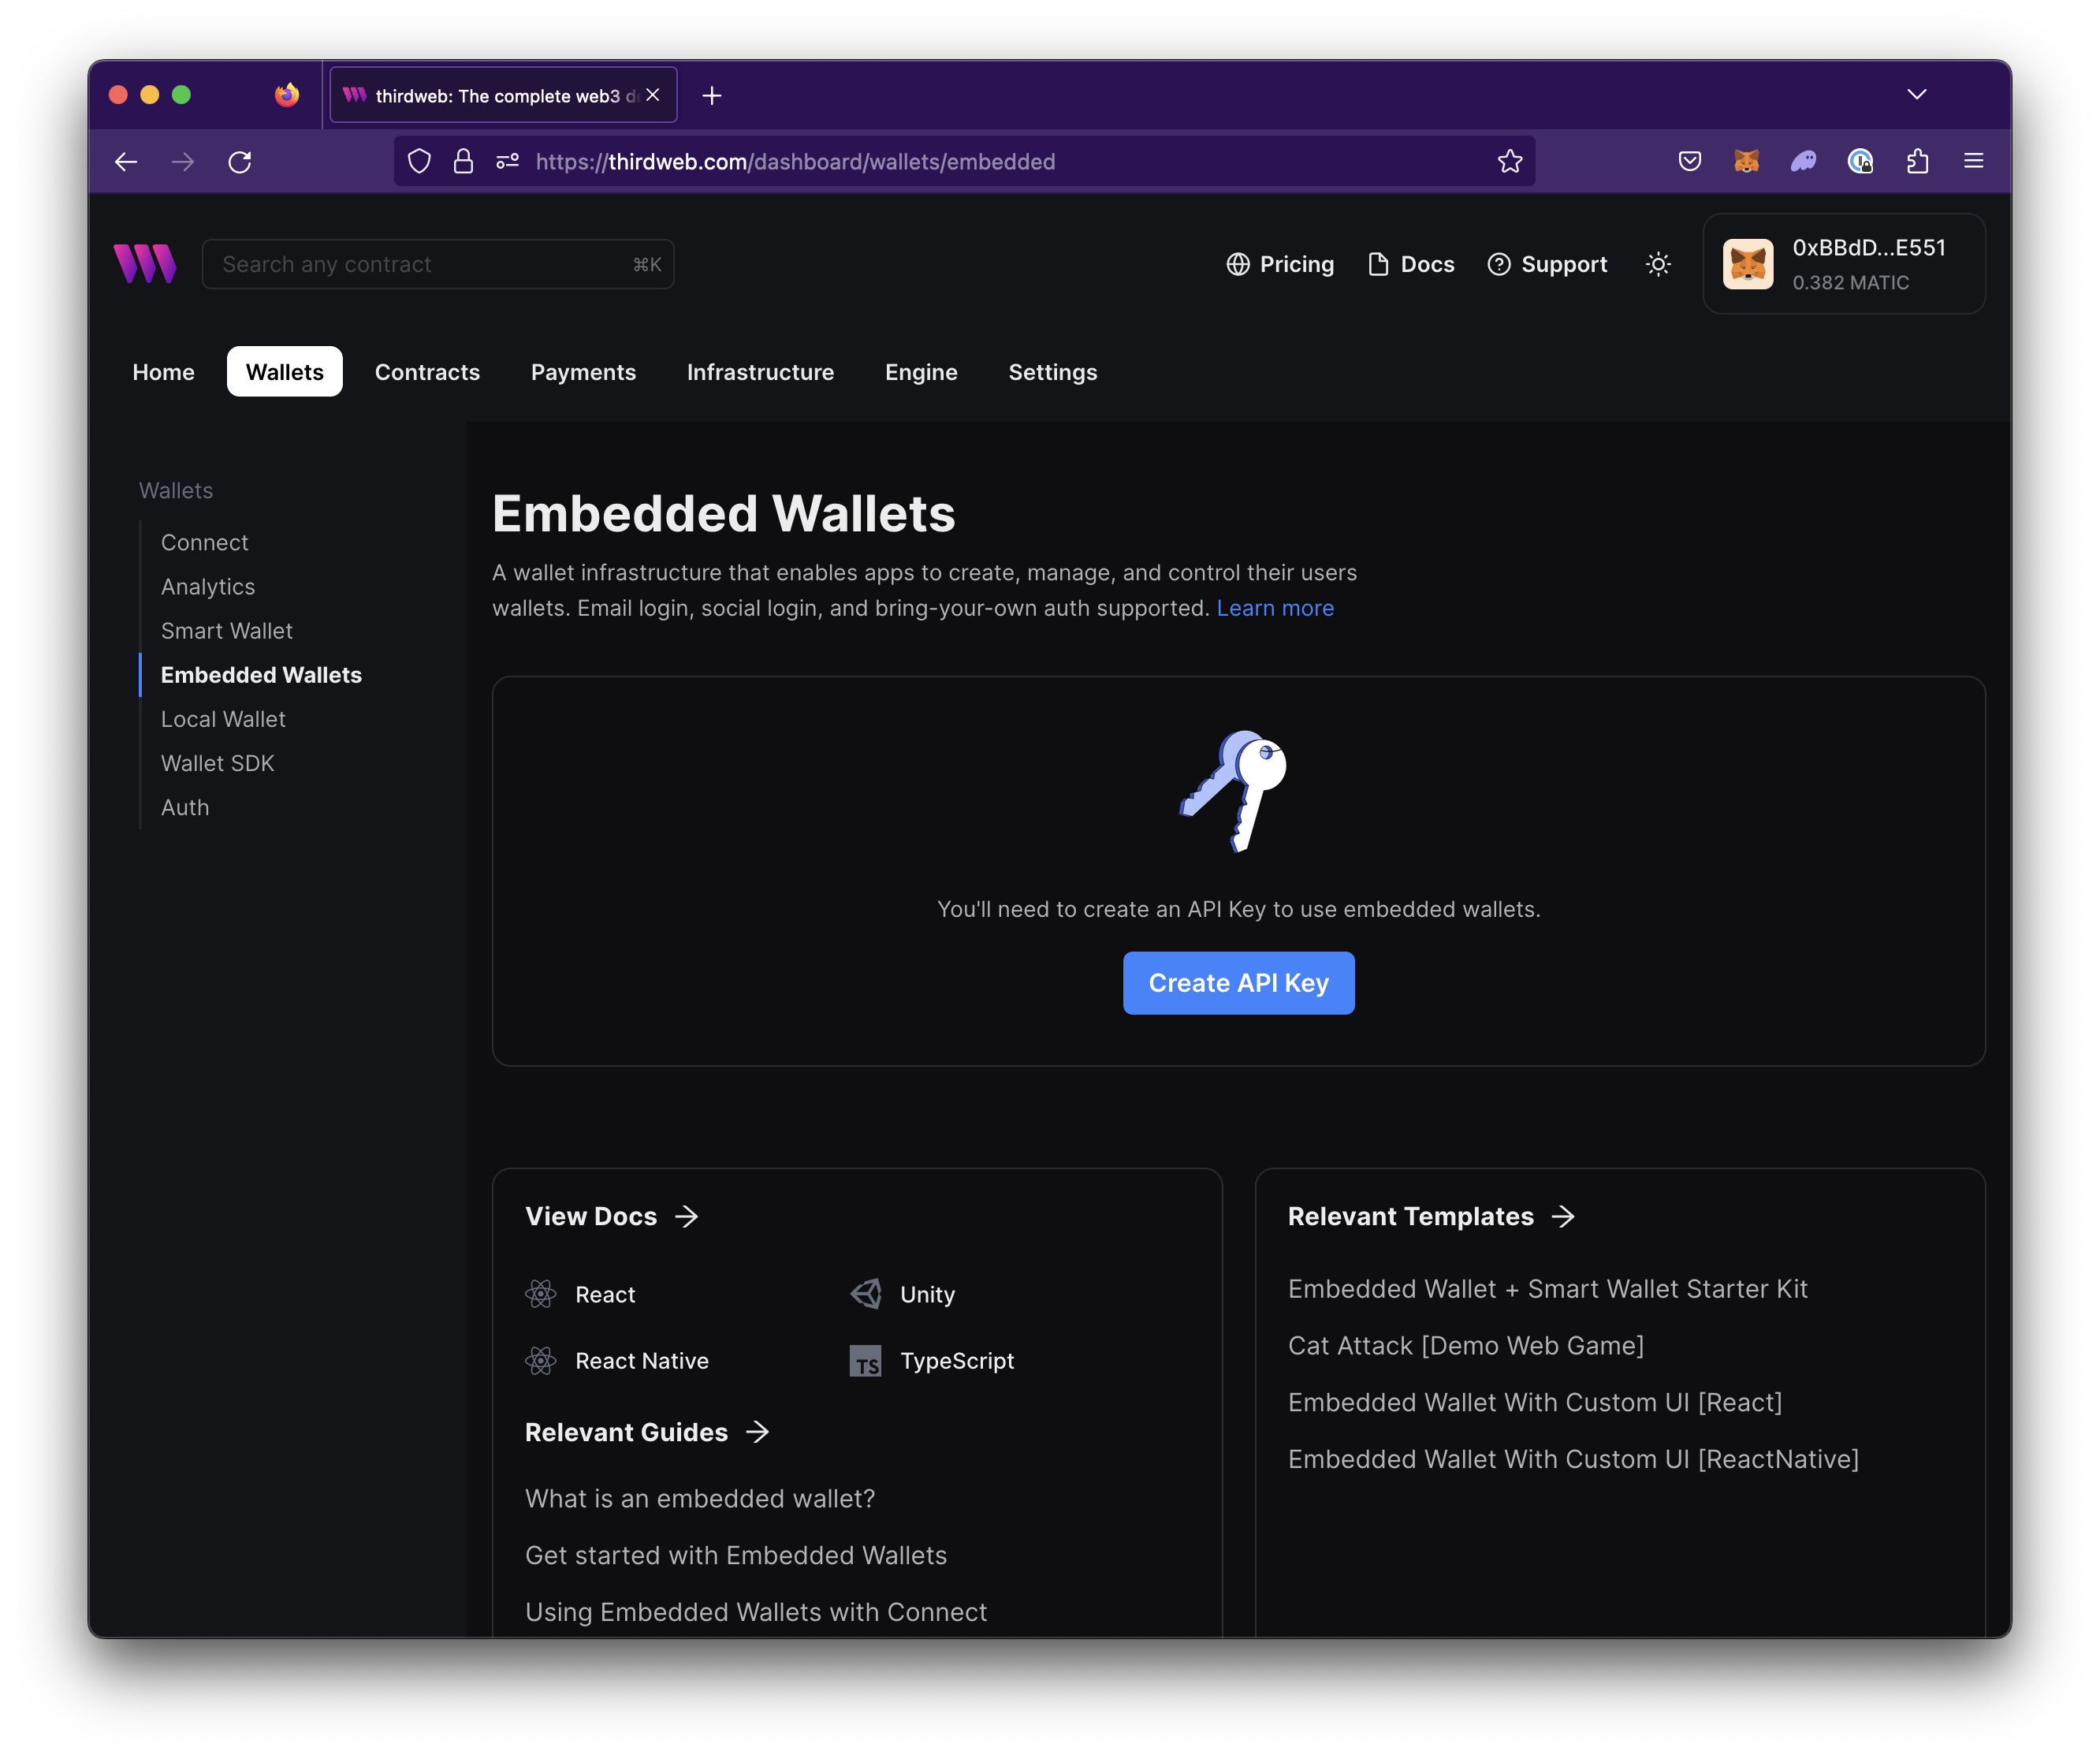
Allowlist domain or bundle ids in Access Restrictions.
Navigate to the Configuration view and enable Custom Auth Endpoint
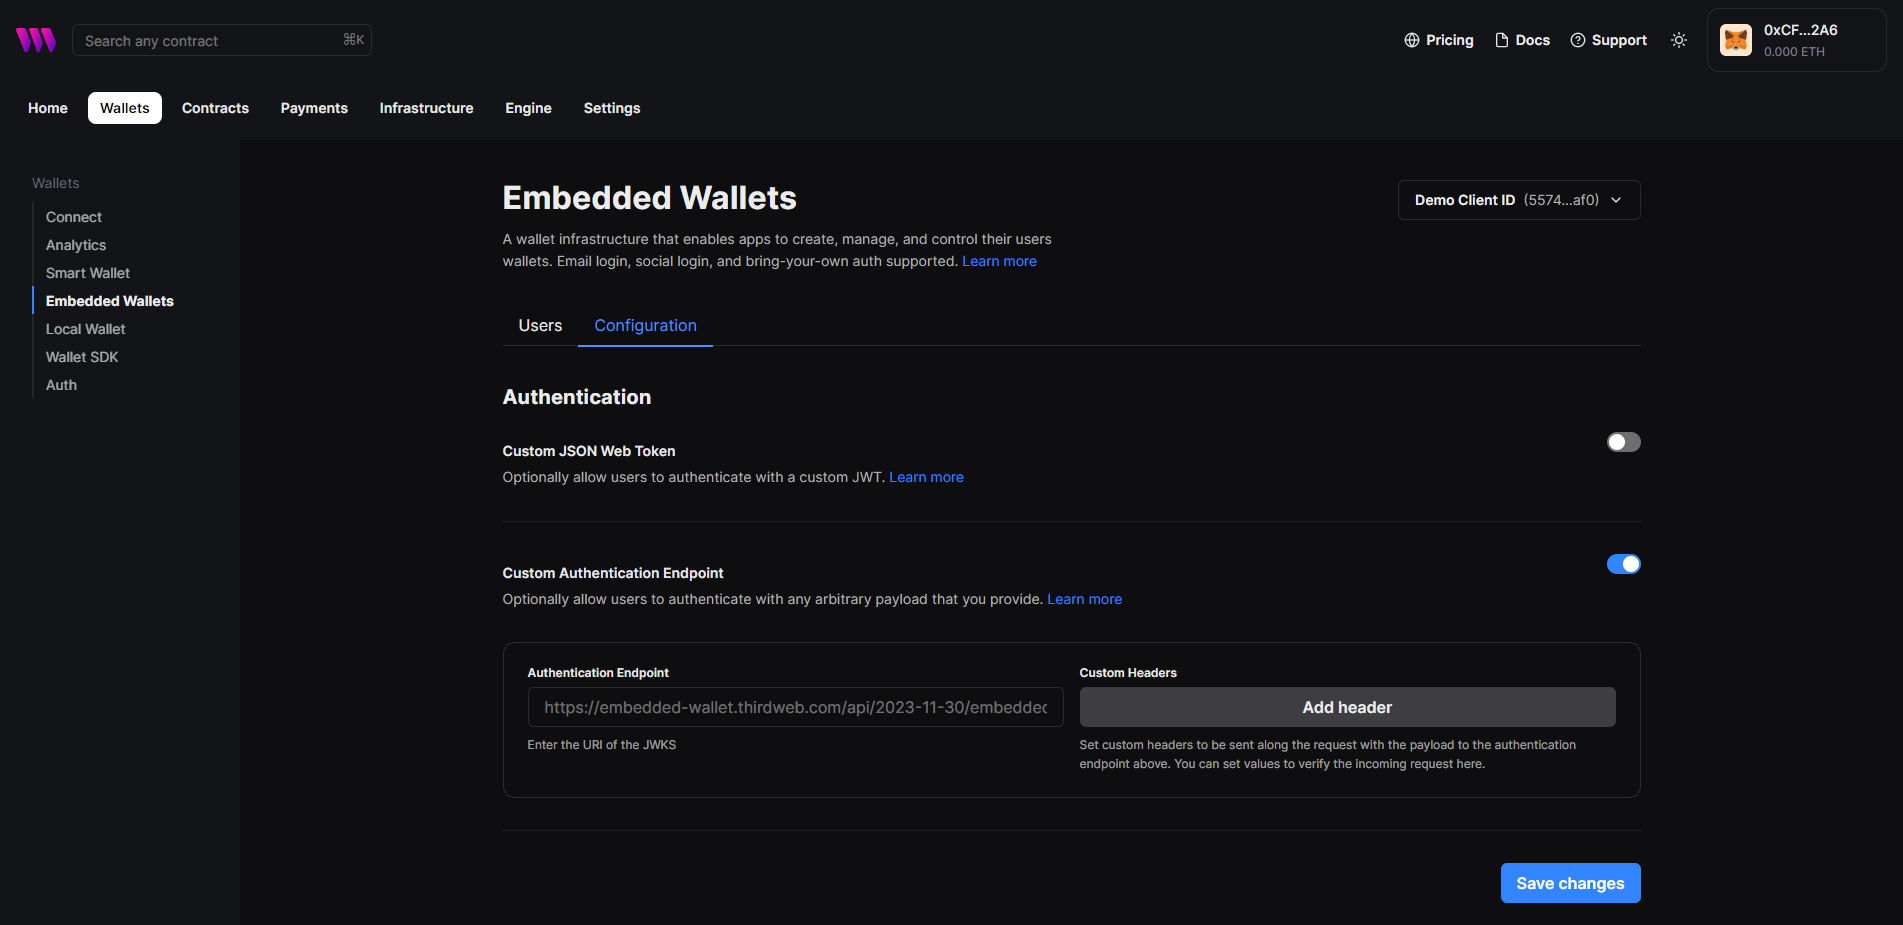
Set the Auth Endpoint URL to
https://embedded-wallet.thirdweb.com/api/2023-11-30/embedded-wallet/auth/test-custom-auth-endpointfor testing purposes. You will replace this later with your own auth server endpoint to verify thepayload.Save the configuration.
Copy the client ID.
In your preferred thirdweb client SDK, pass the payload you retrieved from logging in to the server.
You can now auth into the wallet and use it to sign transactions like so (see use your own auth for more):
- React & React Native
- Other Typescript Frameworks
In React and React Native, the useEmbeddedWallet() hook handles authentication and connection states.
import { useEmbeddedWallet } from "@thirdweb-dev/react"; // or /react-native

const embeddedWallet = useEmbeddedWallet();

const handlePostLogin = async () => {
  await embeddedWallet.connect({
    strategy: "auth_endpoint",
    // in production this would be your public identifier for the user
    payload: JSON.stringify({ userId:"ANY_RANDOM_ID_HERE" }),
    encryptionKey: "ANY_RANDOM_STRING_HERE"
  });
};
In other frameworks, use your own instance of the wallet to authenticate and connect.
import { EmbeddedWallet } from "@thirdweb-dev/wallets";
import { Goerli } from "@thirdweb-dev/chains";

const embeddedWallet = new EmbeddedWallet({
  chain: Goerli, //  chain to connect to
  clientId: "YOUR_CLIENT_ID", // Your thirdweb client ID
});

const authResult = await embeddedWallet.authenticate({
  strategy: "auth_endpoint",
  payload: JSON.stringify({ userId:"ANY_RANDOM_ID_HERE" }),
  encryptionKey: "ANY_RANDOM_STRING_HERE"=
});

const walletAddress = await embeddedWallet.connect({ authResult });
A persistent, cross-platform wallet is now created for your user!
Of course, you would use your own auth server instead of the one we provided. The rest of this guide will show you how to create your own auth server.
Setup
The following steps will show you how to create a simple auth server that can be used with the embedded wallet.
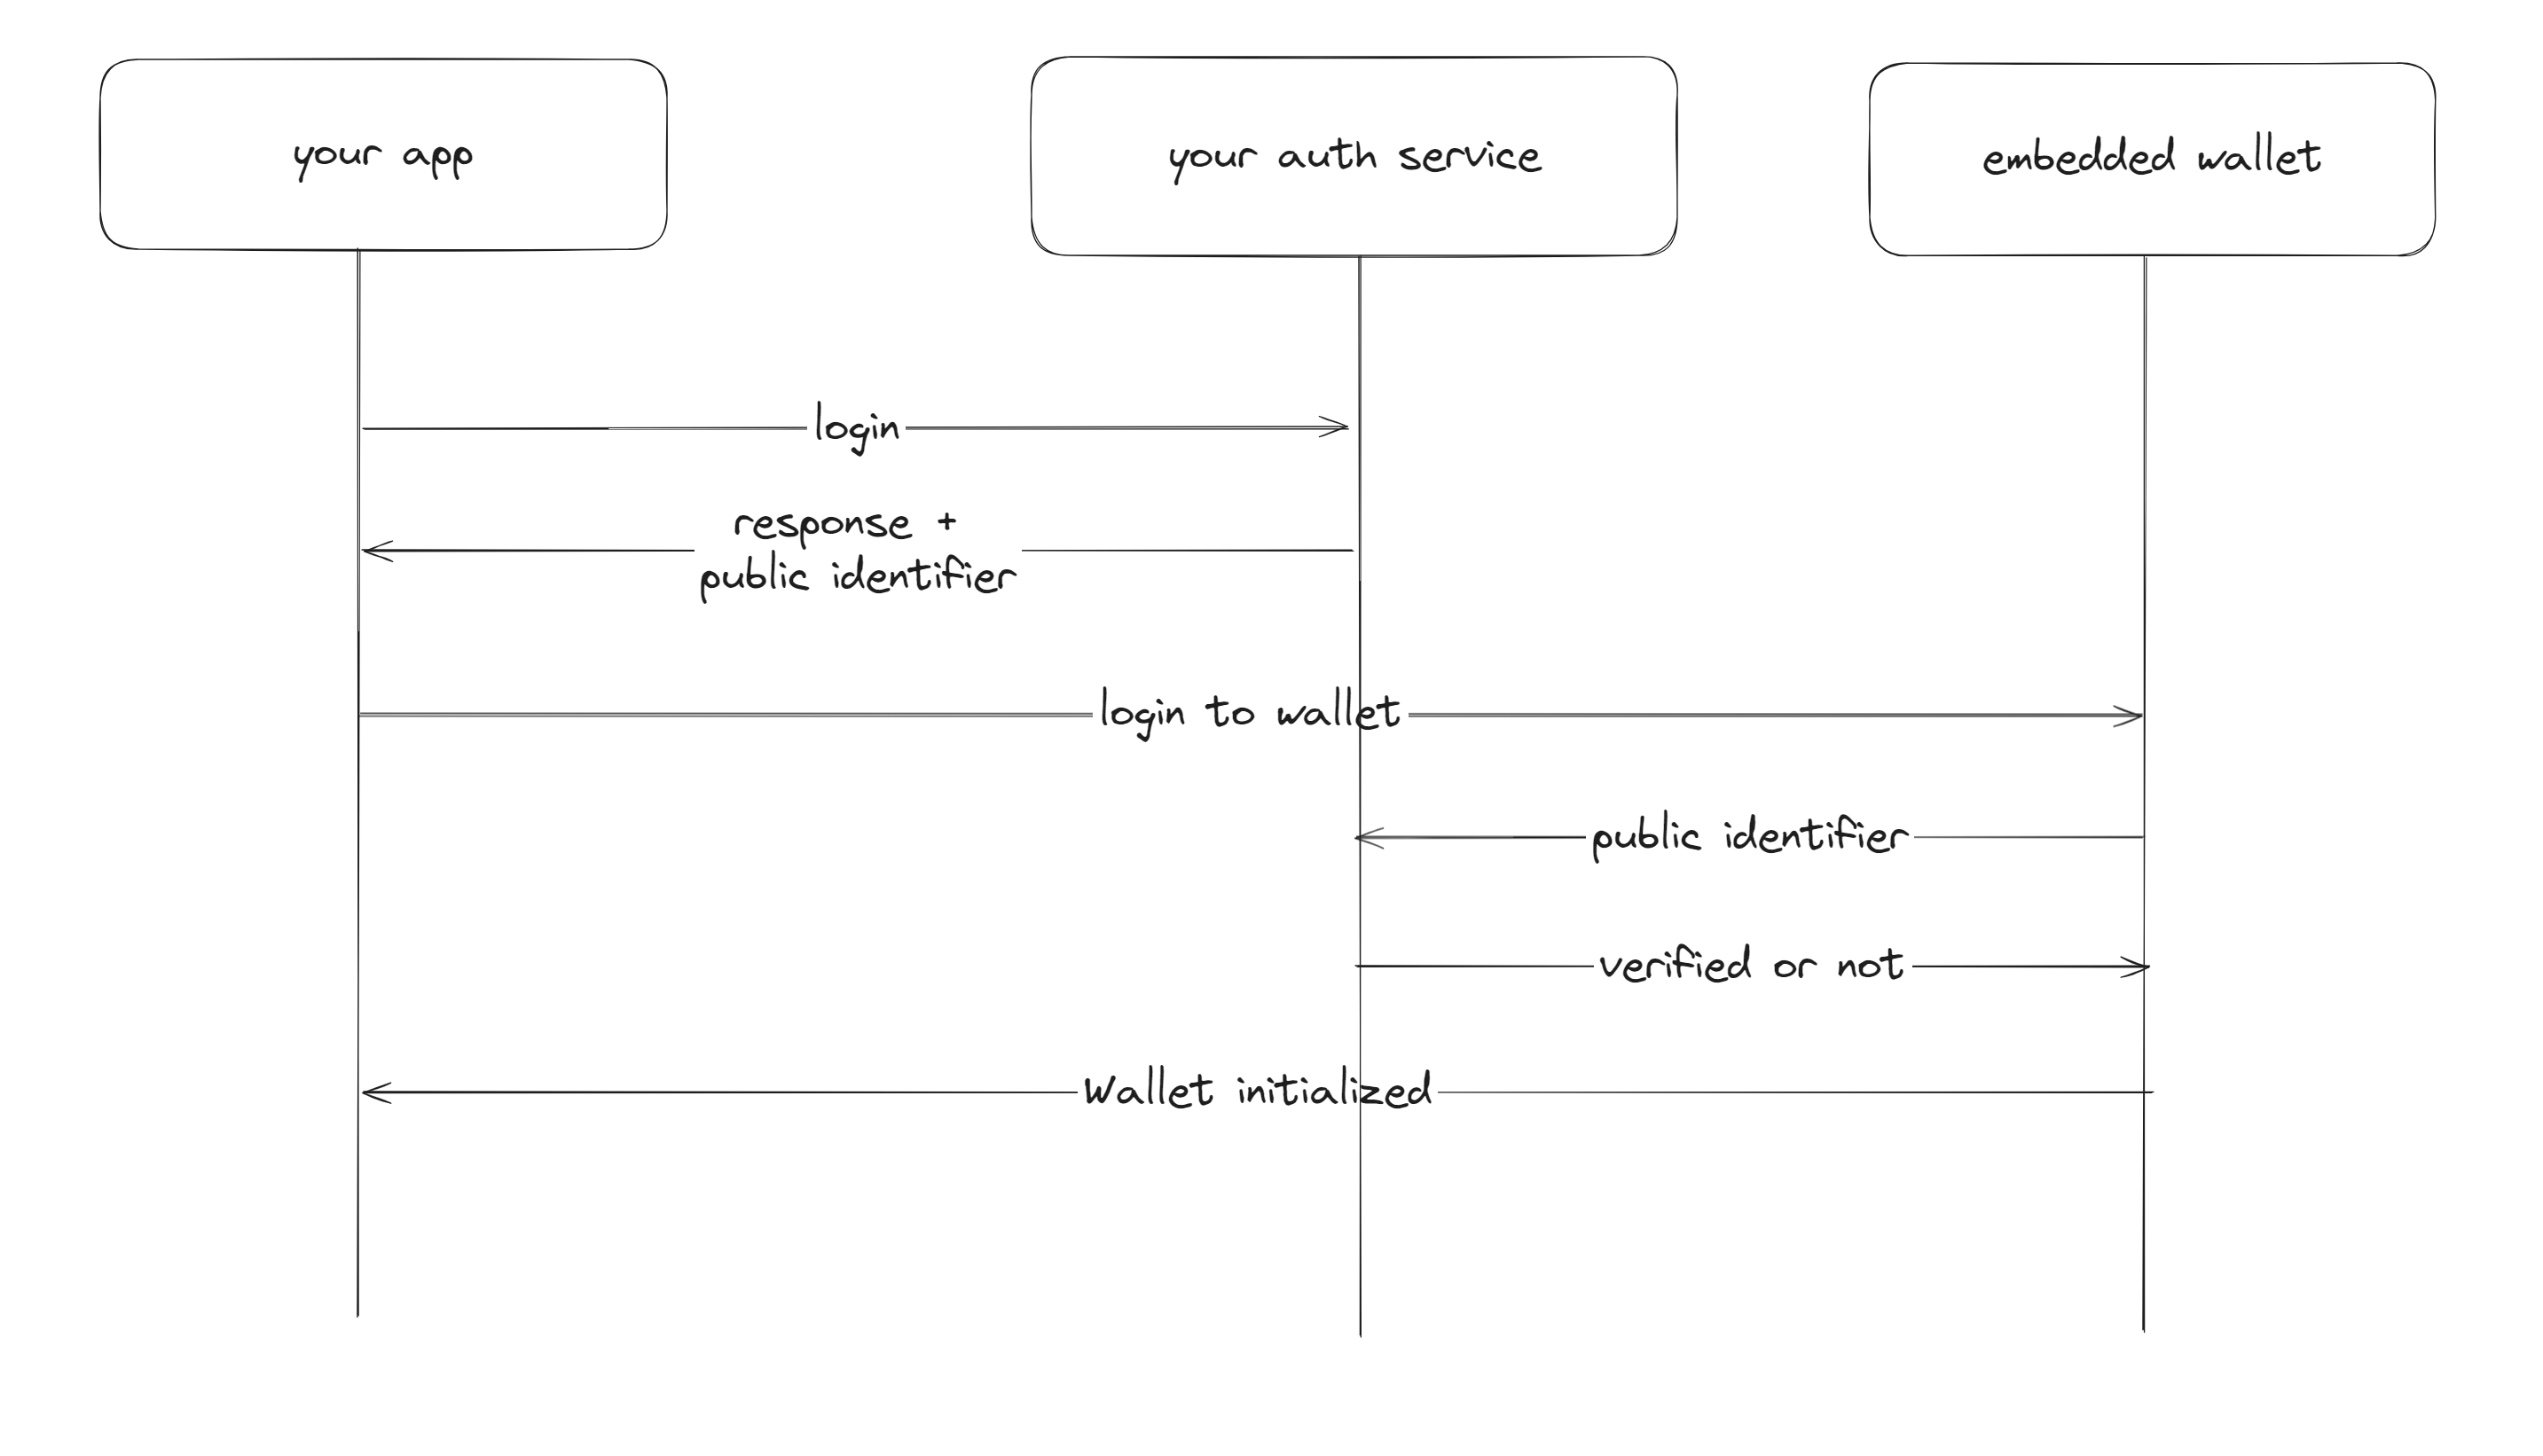
At a high level, the auth server will:
- Handle login for the user into your application.
- Have a way to get a public identifier for the user.
- Have an endpoint to verify the public identifier and return some basic information about the user
Steps 1 and 2 are up to you to implement. You can use any auth strategy you want.
The endpoint in step 3 is what your register as your auth endpoint on the thirdweb dashboard.
Here's a high level diagram:
Create a new directory for your project and navigate to it in your CLI
mkdir custom-auth-server
cd custom-auth-server
Initialize a new Node.js application
npm init -y

yarn init -y
Create the Server:
In the
custom-auth-serverdirectory, create a file at the root namedserver.jsand paste the following:const express = require("express");
const fs = require("fs");
const app = express();
const PORT = process.env.PORT || 3000;
const users = [
{ id: 1, email: "user@example.com", password: "password123" },
];
app.use(express.json());
// This is what your app calls to login a user and get a public identifier for the user (otherwise known as the payload)
app.post("/login", (req, res) => {
const { email, password } = req.body;
const user = users.find(
(u) => u.email === email && u.password === password,
);
if (!user) return res.status(401).send({ message: "Invalid credentials" });
res.send({ payload: user.id });
});
// This is a sample endpoint that yuou would register on the thirdweb dashboard for us to verify the payload
app.get("/thirdweb-will-call-this", (req, res) => {
const { payload } = req.body;
if (!payload) return res.status(401).send({ message: "Invalid credentials" });
// you would write your own logic here to verify the payload here
const user = users.find((u) => u.id === payload);
if (!user) return res.status(401).send({ message: "Invalid credentials" });
// once the user is successfully verified, you can return the following field
return res.send({
userId: user.id,
// the last two fields here are optional
email: user.email,
exp: Math.floor(Date.now() / 1000) + 60 * 60 * 24 * 30,
});
});
app.listen(PORT, () => {
console.log(`Server started on port ${PORT}`);
});
Test Locally
Start the server:
node server.jsTest login:
curl -X POST http://localhost:3000/login -H "Content-Type: application/json" -d '{"email": "user@example.com", "password": "password123"}'
Deploy
To deploy the server, you can use use services such as Zeet or Docker.
Integrate Embedded Wallets
Refer top the quickstart above to integrate the embedded wallet into your application.